Integration
The Integration page is the bot’s API documentation view. It shows the production base URL, available chat endpoints, request fields, and copyable examples for the current bot.
Open it from the bot’s left sidebar and choose Integration.
For the embeddable widget snippet, see the bot Dashboard or Appearance pages, or the Embed the Widget guide.
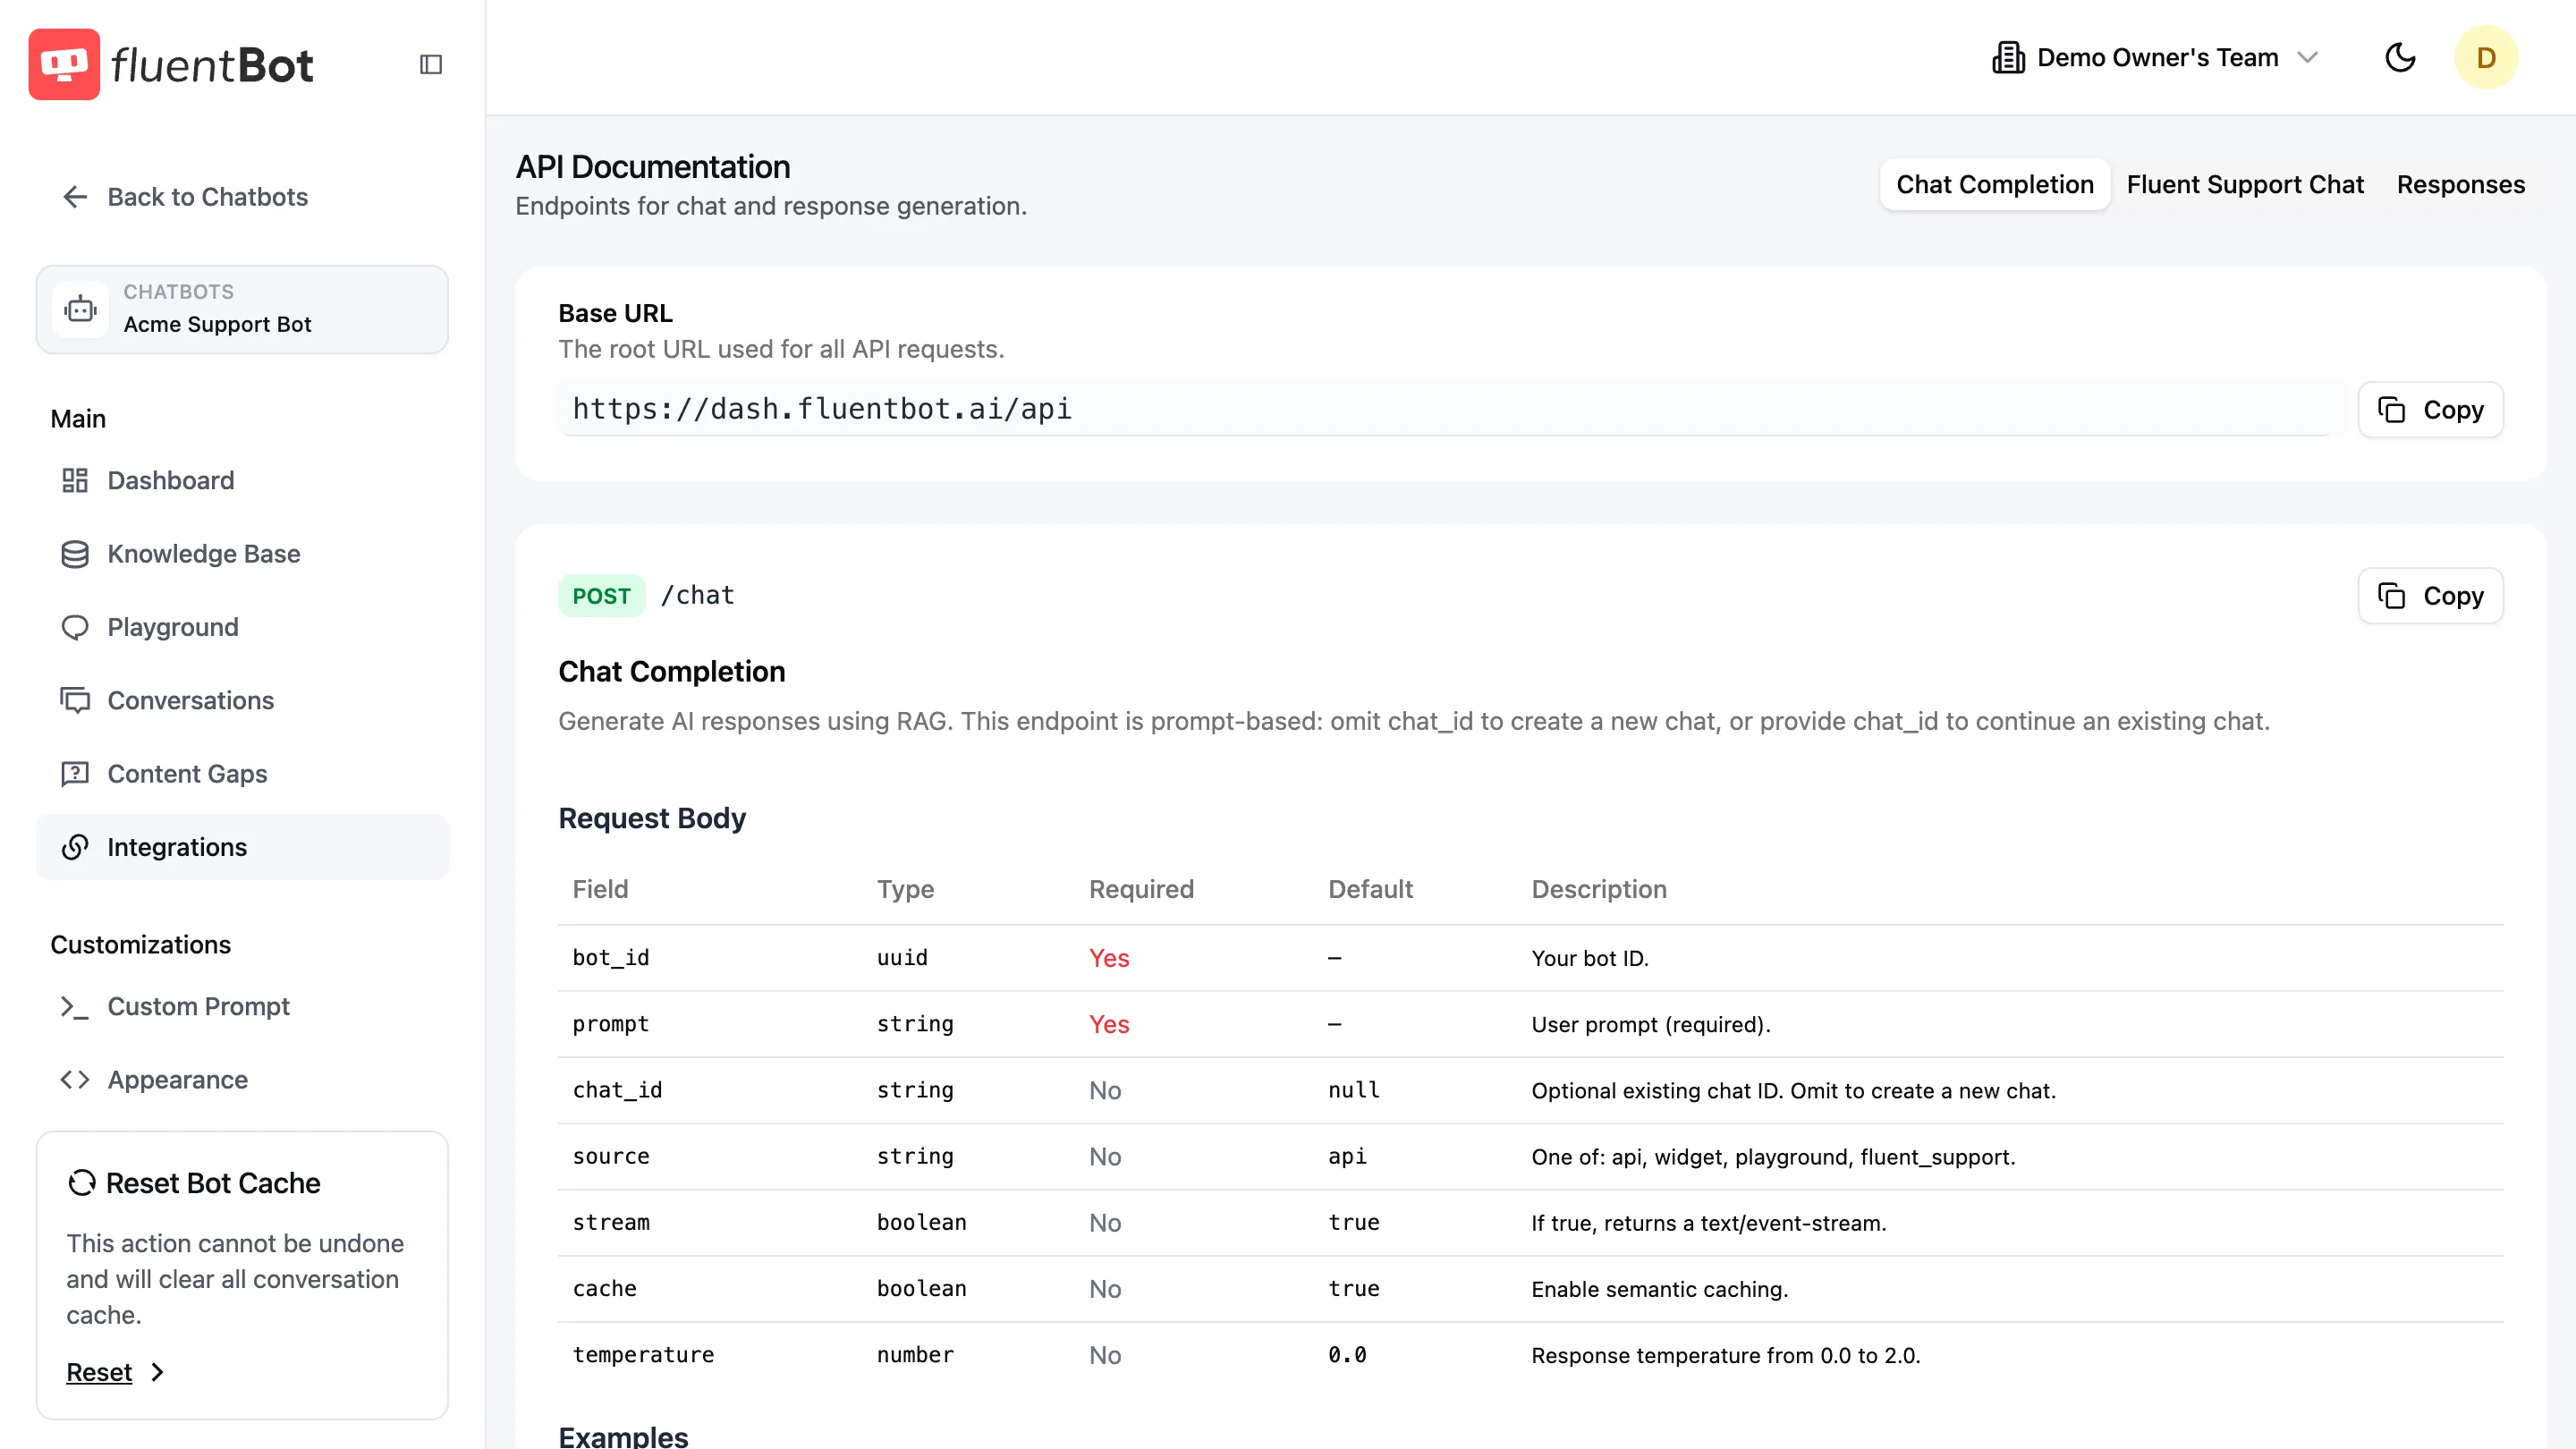
Base URL
The hosted FluentBot API base URL is:
https://dash.fluentbot.ai/apiUse the Copy button beside the base URL when wiring an API client.
Endpoint tabs
Three tabs across the top switch between the available API examples:
| Tab | Use it for |
|---|---|
| Chat Completion | Sending a normal chat prompt to the bot. |
| Fluent Support Chat | Drafting a support-agent reply from a ticket thread. |
| Responses | Lower-level response generation for custom workflows. |
Each tab shows the request body fields and examples for that endpoint. Use the values shown in your dashboard because examples are pre-filled with the current bot ID.
Examples
Each endpoint includes copyable examples for:
- Request — the JSON body to send.
- Response — a standard response example.
- Stream — a streaming response example, where supported.
Click the copy icon on any code block to grab it.
Credentials
Keep API credentials on your server. Do not place private credentials in public website JavaScript. The embedded widget uses the public bot ID and should be installed with the snippet from Embed the Widget.
For signed visitor identity in the embedded widget, see Identity Verification.
Troubleshooting
- Unauthorized response — re-check the bot ID and credentials from the dashboard.
- Browser CORS issue — route private API calls through your backend.
- Different behavior than the widget — compare the exact request body in your API client with the example shown in FluentBot.
What’s next
- Embed the Widget — full setup walkthrough for the widget.
- Widget SDK — programmatic control over the embedded widget.
- Widget Settings — customize before you ship.